Showing posts with label Dessert. Show all posts

Saturday, September 28, 2013

My Apple Pie Recipe

You guys saw my previous post about my apple picking adventures, and if not go check it out now! So if you were wondering what I did with that whole bushel of apples, here is the post that answers that :) This pie is a favorite in my family and I promise it will be in yours too, enjoy!

Here's what you will need:

  • 6 Apples (I like Golden apples but whatever you like most will work)
  • Double layer pie crust--I buy the Pillsbury packaged ones--they come in a roll and are two to a pack which makes the process way easier--you will need just two but I often find that having an extra pack on hand for any mistakes or to reshape the crust is really handy.
  • 3/4 Cups of white granulated sugar
  • One medium orange
  • 2 Tbsp Flour
  • Lemon juice
  • 1 Tsp of cinnamon
  • 1 egg 
  • 1/4 Tsp of Salt
  • 1/4 Tsp of Nutmeg
Preheat your oven to 425 degrees Fahrenheit
  •  Take your glass pie plate and prepare it for baking by either spraying it with non-stick spray or doing like I like to do and smearing a little butter around the whole thing evenly coating it.
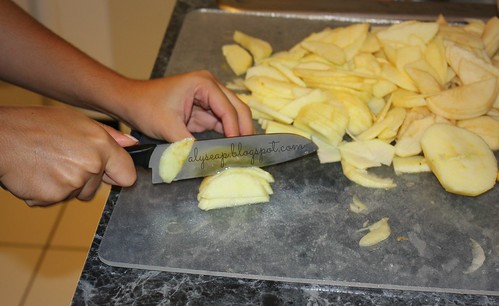
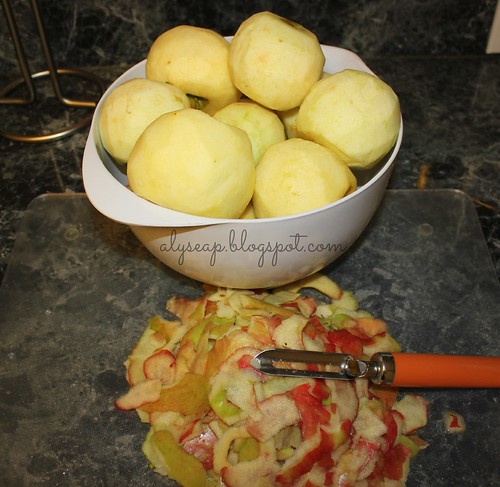
  • Next you want to peel all of your apples and slice them thinly removing the core parts.
pie2

pie3

  • Once your chopped apples are in a bowl, squeeze a little lemon juice over top of them to assure that they don't turn brown while you are preparing everything else. Brown isn't a bad thing, it's just an esthetic thing ;)
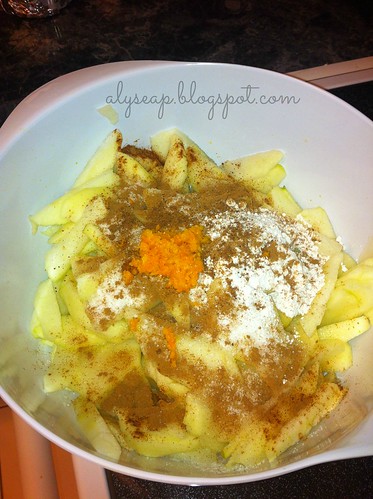
  • After this you will want to add everything else on your ingredients list. For the orange you want to use a zester/microplane or grater to zest the orange--I use 3/4 of the orange but if you're really not into the whole orange thing you can use none at all or 1/2 of the zest from the orange. I personally love the way the orange brings out all of the delicious the flavors we are going to add atop the apples, it's a perfect twist :)
applepie3
  • Spread out the pie crust in the bottom of the pie pan assuring that there are no air bubbles, mine was a little short (this can be fixed by using a rolling pin to flatten it out a bit more) but ideally it would hang a smidge over the side of the plate.
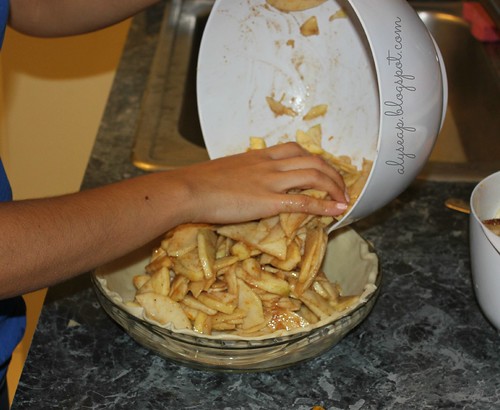
  • Next place all of your seasoned apples in the pie plate and even out. 
pie4
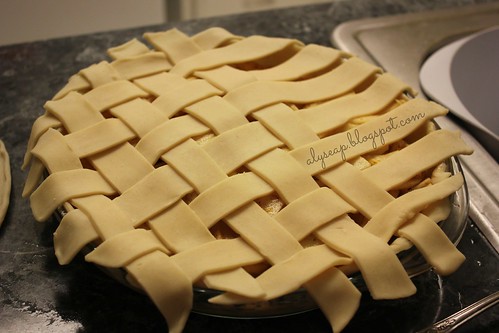
  • Now roll out that second pie crust and cover the apples, there are two ways I like to do so, either a traditional cover-all or a lattice design, either way is beautiful :) 
pie5
This one is only partially completed, but it is a lattice design, it's actually rather easy to achieve, just have to get the pattern down :) My boyfriend did it because I was having no luck with hand eye coordination this evening hahaha We looked up a YouTube video on how to make this top layer so if you aren't sure by just looking at the photo, just watch a video :)


ApplePie1
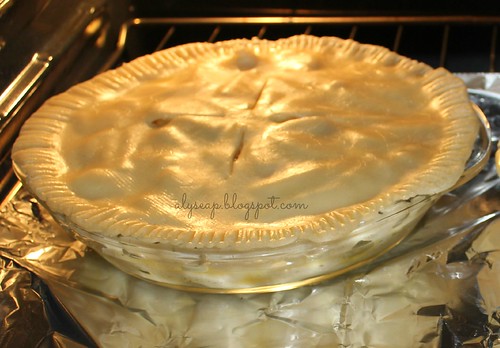
Pictured here is the traditional cover-all design which consists of covering the whole pie and crimping the edges with a fork to seal them together. We then make four slits in the top so that the pie can "breathe" and bake thoroughly.

  • After covering the pie with either design, you will want to make an egg wash of beaten egg with a teaspoon of water. Brush this over top the crust evenly and pop them in the oven for about an hour continuously checking on them. If your edges start to brown too quickly too soon in the baking process, cover them in aluminum foil or a pie crust cover, those are super handy! Continue baking and then let them set to cool for about an hour or so so that everything can come together and not be watery. 
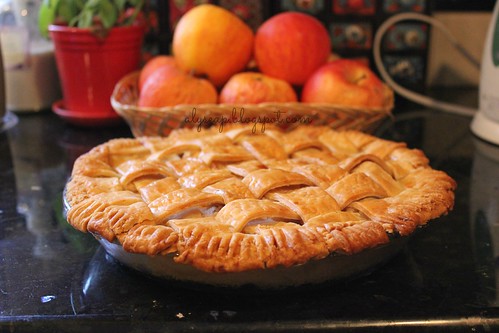
**There is a chance that the pie will bubble over because the juices that are being made on the inside are that divine, just place some foil or a baking sheet underneath of the pie at the beginning of the baking process to keep your oven clean.

pie1

Last but not least, let your taste buds enjoy :) This can be served with a scoop of vanilla ice scream for a really rich treat!

This gal has baked three of these in the past two weeks,
xox

Saturday, December 22, 2012

One of My Weaknesses: Apple Turnovers!

Ingredients:
4 apples (any of your liking, I used a mixture of three in mine because I like to spruce everything up a little ;)- cored and thinly sliced. You may also peel them but this is optional.
3 tablespoons butter
1 cup brown sugar
1 teaspoon ground cinnamon
1 tablespoon cornstarch
1 tablespoon water
1  pkg. Puff Pastry Thawed at room temperature
1 cup confectioners' sugar (for the glaze which is also optional)
1 tablespoon milk
1 teaspoon vanilla extract
1 egg (for egg wash)
1 tablespoon water (for egg wash)
Directions:
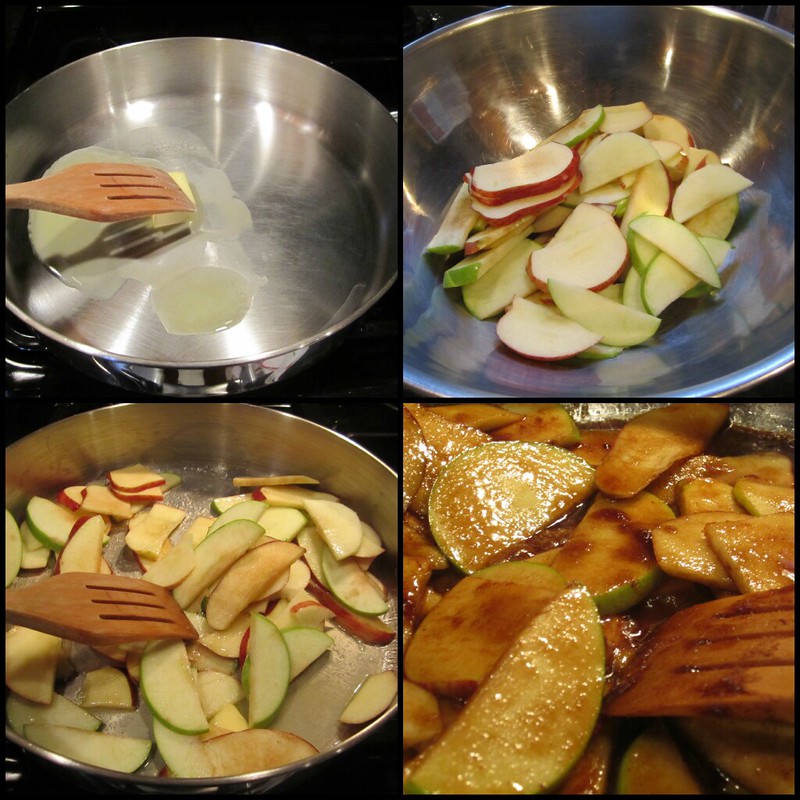
1. Melt butter in a large skillet over medium heat. Add the apples to the melted butter in the skillet and cook them while stirring for about 2-3 minutes. Add brown sugar, and cinnamon, and then cook, for 2-3 more minutes. In a separate dish, mix together cornstarch and 1 tablespoon water. Pour into the skillet, and mix well. Cook for another minute or so, or until sauce has thickened. Set the apple mixture aside from the heat and begin your next step.
2. Preheat the oven to 400 degrees F (200 degrees C).
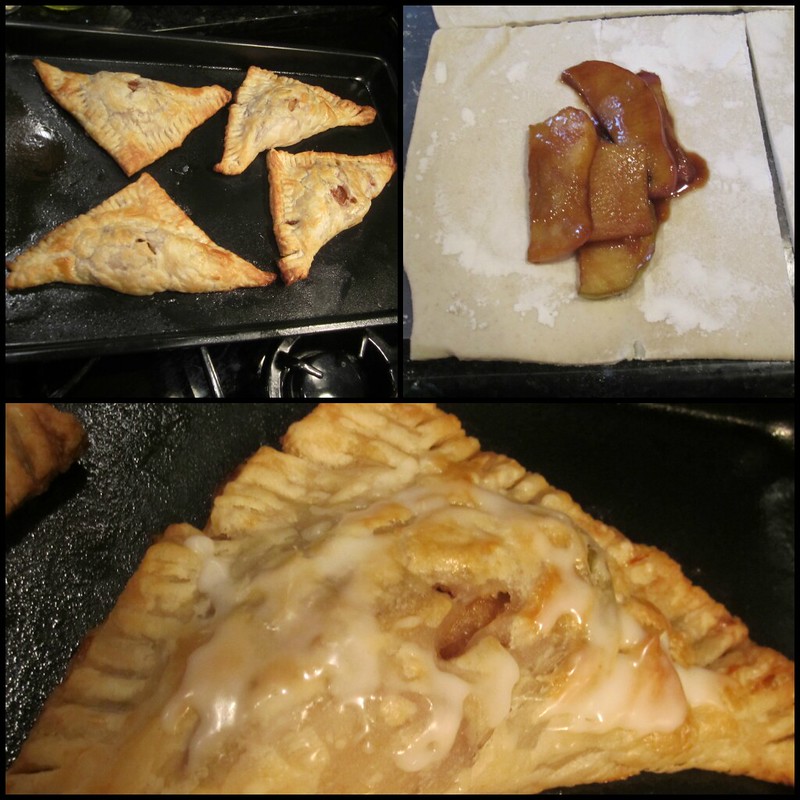
3. Prepare your puff pastry sheets by rolling them out to be about an inch wider than they already are. Be sure to flour everything accordingly so your puff pastry doesn't stick to everything and tear. Trim each sheet into a square. Then cut each larger square into 4 smaller squares. Brush some of your egg wash (your 1 egg beaten with 1 tbsp. of water) alongside the edges of each individual square. Spoon apples onto the center of each squares. Fold over from corner to corner into a triangle shape, and press edges together to seal. Place turnovers on a nonstick baking sheet, leaving about 1 inch between them.  Cut an "X" shaped hole in the top of each pastry to give it breathing room. Then brush some more egg wash over the top so it will get a golden brown crust.
4. Bake for 22-25 minutes in the preheated oven, until turnovers are puffed and lightly browned. Cool completely before glazing.
5. Now for the extra yummy part, the glaze-- mix together the confectioners' sugar, milk and vanilla in a small bowl. Drizzle glaze over your apple turnovers and you're done!


apple2
apple

Enjoy!
xox

Thursday, May 31, 2012

Calling All Nutella Lovers: NUTELLA COOKIES INSIDE!

I am not a fan of Nutella personally, I know start yelling at me now, but I am just not that into chocolate products, and lets face it, this tastes like hazelnut chocolate! However, when incorporated into a cookie, I simply couldn't keep my little hands off of these things! Here is just another way to eat Nutella that will for sure leave others asking "how did you do this?!" :) It is SO simple too! Keep reading below for the recipe, and my next Nutella recipe is coming soon!


Ingredients:

1 ½ cups flour
½ cup granulated sugar
½ cup packed light brown sugar
½ cup unsalted butter, at room temperature
½ cup Nutella
1 egg
¼ tsp. salt
½ tsp. vanilla extract
1 tsp. baking soda
1/3 cup mini chocolate chips

Preheat your oven to 350 degrees Fahrenheit. 

Yields Approx: 25 cookies

Directions:

  1. Mix together the  butter with an electric mixer or a whisk (my favorite) until everything is incorporated and a smooth consistency.
  2. Next put in your brown sugar and your white sugar and mix those very well until the consistency of the mixture is light and airy.
  3. Now you are going to add in that egg. If you are using an electric mixer be sure to have it on a low speed so you don't get splattered! Also add your vanilla at this time and then the Nutella!
  4. In a separate bowl whisk together the flour, baking soda, and salt. Add  these ingredients to wet ingredients, and mix on low speed until incorporated. 
  5. Fold in the chocolate chips now, bringing up the mixer speed to medium at this point.
  6. Now it's time to make the cookie rounds! Take about teaspoon full and roll them into little balls.  I use a cookie scooper to do this with ease and to assure the same size cookies, after all presentation is key remember! :) ** A trick I read online somewhere was to put the dough in the freezer after rolled into the cookies for about 10 mins or so before baking to prevent them from becoming so spread out, I don't know how well this works per-say, because I haven't really ever tried these cookies without doing it lol BUT I say what the heck why not? :)
  7. I baked my cookies about 8 minutes (Remember I put them in the freezer before hand, if you didn't maybe drop the time by 2 mins).
  8.  Let your cookies cool and then serve them up with a big glass of milk! YUM!
Let me know if you guys try this out! They were gone in a day! :)

Nutella isn't just a spread after all,

xox

Tuesday, February 14, 2012

My Valentine's Day Dinner Menu 2012

I did this exact post last year so I figured I would keep the tradition going! I also haven't done a food post in a while so this fit the part.  Let me first state that I feel like all I have been reading on my twitter (@AlyseaP) timeline are things that read something of the sort of "V-Day should be celebrated everyday, why do people only celebrate once a year/I show my significant other I love them everyday so I don't celebrate V-Day" etc. Well let me say that although I agree, you should indeed always show your loved ones you love them, V-Day for me is just a special day that I go above and beyond what I normally do on an everyday basis for my boyfriend. Sure I have cooked for him before, as a matter of fact I do it quite often, but I took this Love filled holiday to cook something extra special that perhaps wouldn't normally be on our menu.  So yes, all of you who have stated the aforementioned, you are correct, you should always celebrate your love everyday, but take V-Day to do something a little extra special! ;)

Now that that has been said, let's get to the menu!

Each year I always ask my boyfriend what he wants for our traditional V-Day Dinner, Chicken, Fish or Steak.  It never fails, he always asks for steak (we eat a lot of grilled chicken and seafood during the year anyway but rarely steak).  I take this day to go to the Butcher and ask for a nice cut of Filet Mignon, after all that is the best of the best when it comes to red meat in my opinion.  Along with this and every dinner I ever make, I try to always have a Meat or Fish/ Vegetable and a Starch.  If I am ever making Pasta as my starch, I will try and throw in a little chicken (ex: Penne a La Vodka with Chicken) It is very necessary to have a well rounded meal after all!

Here is what I decided on this Valentine's Day:

Meat: Filet Mignon in a Merlot Wine Sauce
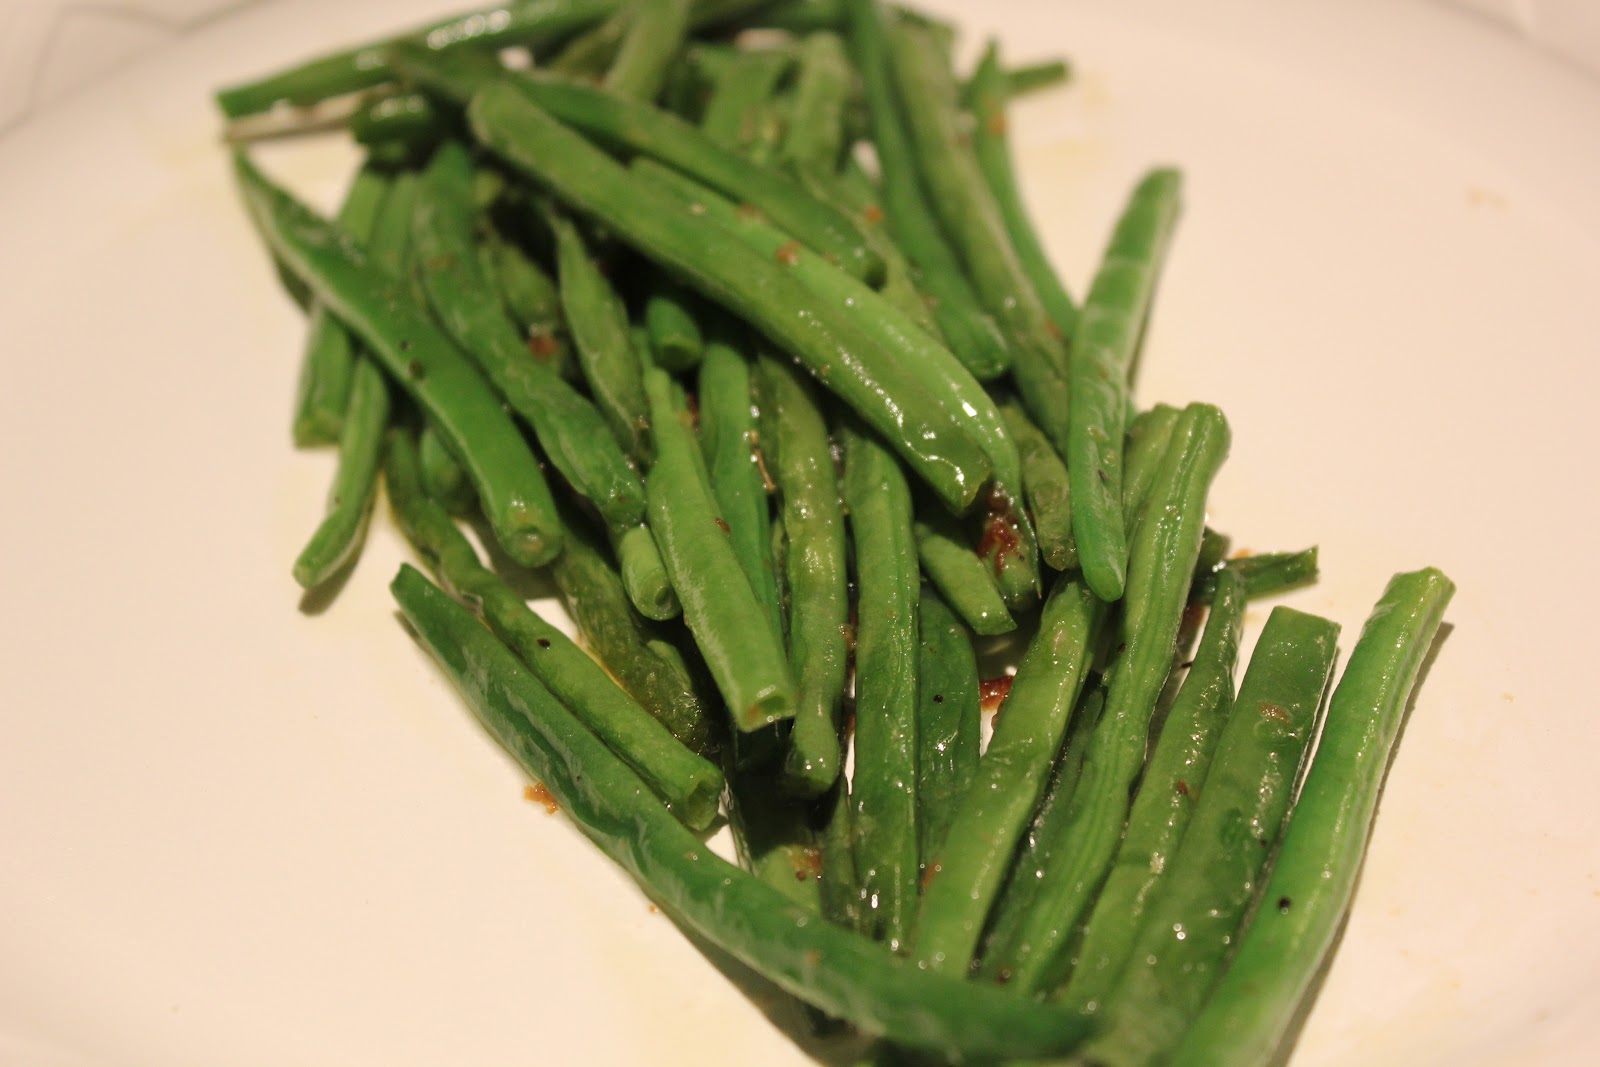
Vegetable: Sauteed French Green Beans
Starch: Herb & Garlic Roasted Potatoes
Dessert: Mini Cheesecakes w/ Fresh Strawberries

The fun part is the dessert.  In many years past I have made Red Velvet Cake or Cupcakes, this year I just wanted to do something a little different.  My boyfriend and I love cheesecake, but often when I make a whole one, we are unable to finish the entire thing and my hard work goes to waste as it sits there for weeks in the fridge! Cheesecake is such a rich dessert that one tiny piece really fills you up. This means we eat less of it than we normally would in turn making most of the 9" cheesecake go to waste! Waste is a no-no for me so this year I tried something different, Mini Individual Cheesecakes! :) Each one was the PERFECT serving size and the presentation is really beautiful might I add.

Here are some pics I took of my cooking rendezvous for Sunday Night (the night we celebrated V-Day because celebrating during a weekday is near impossible for working folks haha)


Everything pictured above I made from scratch. The cheesecakes I made the night before and let set in the fridge overnight so that I wasn't so stressed the day of, but everything else I made in one night.  The approximate time it took me to finish everything from beginning to end was around 2.5 hours.  It was WELL worth it let me tell you.  He LOVED every bite :) In one of the photos above you can even see what I got him for V-day--his own custom beer labels :) I bought some of his favorite beer and attached the custom labels so he could have his own Valentine's Day beer to sip on while he enjoyed his Valentine's Day Dinner, it was really the icing on the cake!

If you guys want recipes for any of the things I mentioned above, please let me know in the comments below and I will either do another post with all the recipes or forward them to you individually.  I know I am posting this on Valentine's Day, but this meal could even come in for a great Birthday or Anniversary meal or heck an everyday meal to show you love someone (Family, Friends etc) ! <3


Happy Valentine's Day Everyone,

xox

Pin It