Showing posts with label Food. Show all posts

Saturday, March 23, 2013

Cajun Chicken Stuffed w/ Spinach and Pepper Jack Cheese FULL MEAL RECIPE!

Chicken is so handy to have in the fridge or freezer  because the options for meal time when it comes to chicken are almost endless. Let's see there is chicken parmigiana, grilled chicken, lemon chicken, balsamic chicken, chicken cubes for stew, stir fry, I could go on forever. This is just another variation of a simple chicken dish, yes SIMPLE. It is super tasty, beginner friendly and will be a crowd pleaser for sure. Let's get to the good stuff:

Ingredients: 
  • 1 package of boneless chicken breasts (or however many you may need to feed your group). Make sure they are the full sized ones and not the thinly sliced ones, I'll explain why later ;)
  • Pepper jack cheese, preferably shredded but if you have slices no worries, we can make that work too!
  • 1 c frozen spinach, thawed and drained (I used fresh spinach instead)
  • 2 tbsp olive oil
  • 2 tsp Cajun seasoning-This can be found in the spice aisle of your supermarket usually
  • 1 tbsp breadcrumbs
  • Salt and Pepper to taste
  • Wooden toothpicks
     
 Directions: 
  1. Preheat your oven to 350 degrees F. 
  2. Butterfly (slice in half but not all the way through, see photo below) the chicken breast and flatten a little with mallet. 
  3. At this time if you are using fresh spinach, cook it down in a pan with a little water.
  4. In a bowl combine the cooked spinach, cheese and salt and  pepper. (if you are using sliced cheese like I did in the photos, just break them up into tiny pieces.
  5. In a separate bowl, mix the bread crumbs and Cajun seasoning together. 
  6. Now for the creative stuff :) on each piece of chicken, spoon a little bit of the spinach and cheese mixture in and begin to roll it together fastening it with as many toothpicks as needed keeping in mind how many you use so you know how many you have to take out later. We don't want anyone eating any wood chips ;)
  7. In a baking pan or on a baking sheet, line it with some aluminum foil and place the neatly sealed chicken breasts seam side down. With a kitchen brush, "paint" on some of the olive oil on each piece of chicken and then sprinkle on the Cajun seasoning and breadcrumb mixture. Make sure you get the seasoning all around the sides of the chicken, even the under-side. The more flavor the better!
  8. Pop these in your oven for 35 minutes or so or until you can assure that your chicken is cooked thoroughly.

IMG_3681
IMG_3684
IMG_3686
IMG_3688
IMG_3690
That little piece in the bottom is a piece I made for my dog, spoiled, yes I know hahah :)
IMG_3695
chicken

Here are quick recipes for the sides I made to accompany this dish:
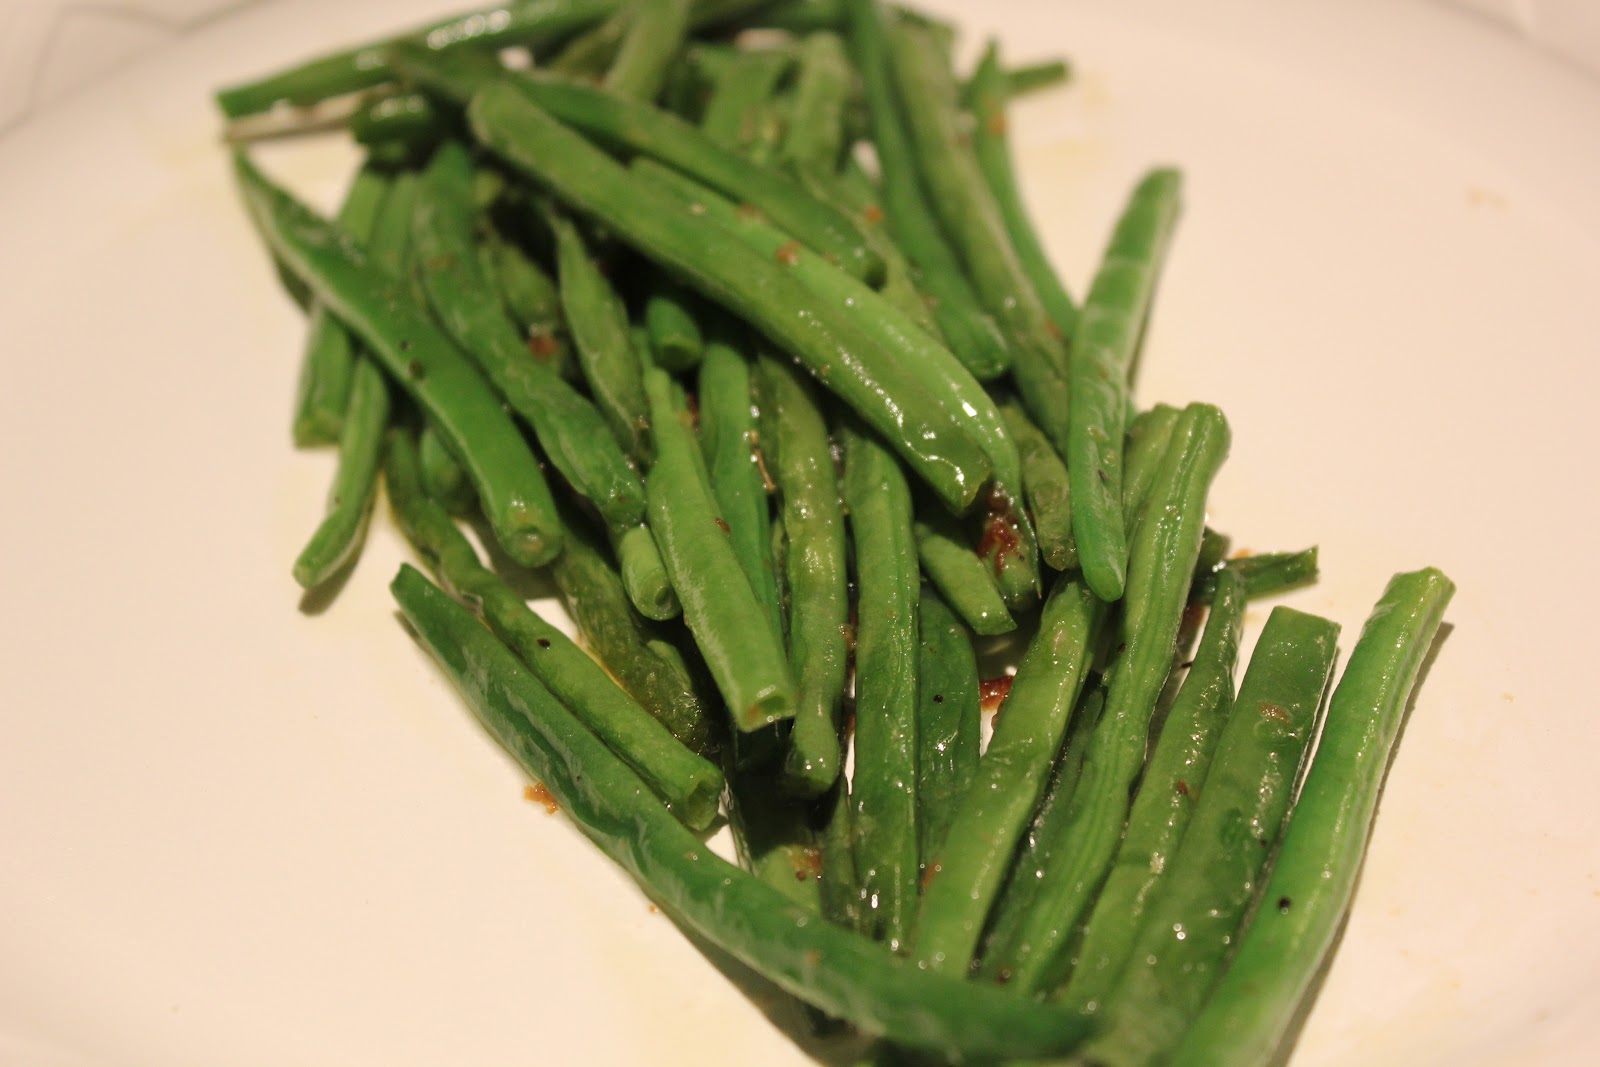
Sauteed Green Beans
  • Wash the green beans and coat the bottom of a sautee pan with a tablespoon or so of olive oil
  • Add minced garlic as much as you like over medium to low heat
  • When the aroma begins to kick in, add in the green beans and cook for a few minutes until they are soft enough for your liking. I like mine a little crunchy so I take mine out earlier ;)
  • You can also add a little salt and pepper if you wish
Quick and Easy Potato Wedges
  • Slice your potatoes into wedges, thin or thick as you like
  • Place them in cold water for a minute or so, remove them and dry them completely
  • Sprinkle a little olive oil over them and some fresh ground sea salt
  • Place them in the oven at 425 degrees until they become golden brown and cooked through (35 mins give or take---this has always taken a different amount of time each time I've made them...just keep an eye on them and keep mixing them to see when they're done the way you like them :) 
IMG_3697
 

IMG_3693

My mouth is watering just thinking about this, I have to make it again soon!

xox

Monday, February 11, 2013

A Warm & Cozy Meal: My Stuffed Peppers Recipe

I posted photos of this on Instagram and Twitter (@alyseap) this weekend and I got great feedback :) Here is what I made this weekend, photos and full recipe included. Enjoy!


newone

33

1

14

15

17

66

Ingredients:

  • 4 Bell Peppers (try and make sure they are shaped nicely to sit upright and firm as well)
  • 1/2 cup chopped onion
  • 1 1/2 cups cooked brown rice (you can use any rice you prefer)
  • 1 can (14.5 oz.) of diced tomatoes (I used spicy tomatoes and it added a nice kick!)
  • 1 can of tomato sauce
  • 1.5 cloves of garlic minced
  • 2 Tbsp. EV Olive Oil
  • 1 Tsp. Basil
  • 1 Tsp. Oregano
  • Salt and Pepper to taste
  • 1 Egg
  • 2 Tsp. Worcestershire Sauce
  • Between 1-1.5 Lb.s Lean ground beef (I ended up using 1.15 Lbs. and it was perfect!)
  • Optional Grated Cheddar Cheese to top off at the end
Preheat your oven to 350 degrees F.

Directions:
  1. Wash your peppers and core out the insides removing all seeds and things of the sort. You can do so by slicing off just a bit of the top and scooping out everything else. 
  2. Because we try not to waste anything, use some of the pieces of  pepper that you cut off from the top that may be salvageable (or some new pepper if you wish) to cut about a half cup of pepper for the sauce. 
  3. In a large pot of salted water, add the peppers that you have cored out.  Bring them to a boil and let them simmer for about another 3-4 mins. Then remove and drain. 
  4. Heat your olive oil in a pan and add in your chopped pepper pieces, onion and garlic until they are tender.  
  5. Add in all of your tomato products (sauce, diced tomatoes, etc) along with your spices (oregano and basil, salt, pepper etc.) Cook this thoroughly in a simmer for about 8 minutes or until all of the flavors smell delicious and look well combined :)
  6. Next we beat our egg with the Worcestershire sauce and a pinch of salt and pepper. Add to that our ground meat and cooked rice and mix everything very well. Add in about 1.5 cups of the tomato mixture to help everything stick and come together and to seal all of the delicious flavors in. 
  7. On your nonstick baking sheet or casserole dish, place all 4 peppers down and begin to fill them with the meat and rice mixture.  I make sure to press down gently while filling to make sure that there are no air pockets in the peppers that are missing some of this delicious mixture! 
  8. Fill them to the brim and top off with the remainder of the tomato sauce mixture that you have left over--then place in the oven to bake for around 1 hour. 
  9. When the timer goes off, I shut off the oven and sprinkled a nice portion of the grated cheddar cheese over the top and closed the oven again (with the heat off at this point)--there is still enough heat in the oven to melt the cheese ;)
  10. Serve and enjoy!
*You can serve this with any side--add more plain rice to mix together or even serve with a baked potato or alone (how I had it)!

Any questions or clarifications, comment below or check out the "Contact Me" tab above for my email link!

Savory and Warm Meals,

xox

Thursday, June 14, 2012

My Favorite Pasta Dinner Lately-Recipe Included!

At work yesterday, I began craving this meal so badly! It is hard to plan entire meals to cook because I get out of work at 7 and by the time I make it home the last thing I want to do is cook a full on meal, but sometimes, like in this instance, it is a must! This dish is so savory and my boyfriend actually eats the broccoli which must mean its delicious as he is not one for greens! lol The first time I made this dish was a few months back when I saw it in my FOOD magazine, I was in love!  (By the way, if you are a foodie like me, I HIGHLY suggest subscribing to that mini magazine, it has AMAZING recipes every month and they cater to the season!) Anyway, back to my craving haha I stopped by the supermarket after work and picked up the ingredients and I definitely wasn't disappointed with the turnout!

Here is how I made it happen:

Rigatoni with Sausage and Broccoli: 

Ingredients: 

  • 1 pound rigatoni
  • Salt and ground pepper
  • 1/4 cup extra-virgin olive oil
  • 2 heads broccoli
  • 2 garlic cloves, minced
  • 1 tablespoon finely grated lemon zest, plus 2 tablespoons lemon juice
  • 1 pound Italian sausage MEAT (You can purchase just the sausage meat without the casings, that's what I always do!) --I used Mild, you can use hot if you'd like, next time I will probably try that!
  • Parmesan, grated, for serving

 Lets get to it:
  1. In a large pot of boiling salted water, cook pasta according to package instructions. In last 2 minutes of cooking, add broccoli and cook until bright green and crisp-tender. Reserve 1 cup pasta water; drain pasta and broccoli.
  2. Meanwhile, in a small bowl, whisk together oil, garlic, lemon zest and juice, 1/2 teaspoon salt, and 1/4 teaspoon pepper.
  3. Add sausage to pot and cook over medium-high, breaking up meat with a wooden spoon, until browned and cooked through, 8 to 10 minutes. Remove from heat, return pasta and broccoli to pot, and add oil mixture. Toss well to combine, adding enough pasta water to create a thin sauce that coats pasta. Serve sprinkled with Parmesan.

    *This recipe originally had Anchovies incorporated in the sauce, which I hear really brings out the flavors of the dish without actually tasting like fish, BUT I just cannot bring myself to put them in here lol If you would like that version then add 4 minced anchovy fillets into your olive oil mixture!


    This dish is an amazing next day dish as well! The flavors almost marinate all together overnight and it is almost more delicious :)


buon appetito!, 


xox

Saturday, May 5, 2012

My Cinco de Mayo/ Fight Night Menu

This Saturday, today, is a pretty huge food day for me :) Not only is it Cinco de Mayo, but it is also fight night for Mayweather and Cotto! This means this gathering will serve two purposes which means I must find a way to incorporate the two.

Here is how I did so:

I wanted to stick with appetizers so it was easy to just grab and go while watching the fight. I wanted to do appetizers with a Mexican theme to incorporate Cinco de Mayo ;) I chose to make two pretty popular dishes, guacamole and nachos. Who doesn't love a good guacamole dip and some super cheesy nachos?!

With the guacamole I made homemade tortilla chips. Much better (at least in my opinion) than the regular restaurant style fried salty chips. It's super easy too!


Here are some photos of my cooking journey this evening. Enjoy!

* if you would like the recipes for anything I made please let me know and I will forward them! :)

Xox

Tuesday, February 14, 2012

My Valentine's Day Dinner Menu 2012

I did this exact post last year so I figured I would keep the tradition going! I also haven't done a food post in a while so this fit the part.  Let me first state that I feel like all I have been reading on my twitter (@AlyseaP) timeline are things that read something of the sort of "V-Day should be celebrated everyday, why do people only celebrate once a year/I show my significant other I love them everyday so I don't celebrate V-Day" etc. Well let me say that although I agree, you should indeed always show your loved ones you love them, V-Day for me is just a special day that I go above and beyond what I normally do on an everyday basis for my boyfriend. Sure I have cooked for him before, as a matter of fact I do it quite often, but I took this Love filled holiday to cook something extra special that perhaps wouldn't normally be on our menu.  So yes, all of you who have stated the aforementioned, you are correct, you should always celebrate your love everyday, but take V-Day to do something a little extra special! ;)

Now that that has been said, let's get to the menu!

Each year I always ask my boyfriend what he wants for our traditional V-Day Dinner, Chicken, Fish or Steak.  It never fails, he always asks for steak (we eat a lot of grilled chicken and seafood during the year anyway but rarely steak).  I take this day to go to the Butcher and ask for a nice cut of Filet Mignon, after all that is the best of the best when it comes to red meat in my opinion.  Along with this and every dinner I ever make, I try to always have a Meat or Fish/ Vegetable and a Starch.  If I am ever making Pasta as my starch, I will try and throw in a little chicken (ex: Penne a La Vodka with Chicken) It is very necessary to have a well rounded meal after all!

Here is what I decided on this Valentine's Day:

Meat: Filet Mignon in a Merlot Wine Sauce
Vegetable: Sauteed French Green Beans
Starch: Herb & Garlic Roasted Potatoes
Dessert: Mini Cheesecakes w/ Fresh Strawberries

The fun part is the dessert.  In many years past I have made Red Velvet Cake or Cupcakes, this year I just wanted to do something a little different.  My boyfriend and I love cheesecake, but often when I make a whole one, we are unable to finish the entire thing and my hard work goes to waste as it sits there for weeks in the fridge! Cheesecake is such a rich dessert that one tiny piece really fills you up. This means we eat less of it than we normally would in turn making most of the 9" cheesecake go to waste! Waste is a no-no for me so this year I tried something different, Mini Individual Cheesecakes! :) Each one was the PERFECT serving size and the presentation is really beautiful might I add.

Here are some pics I took of my cooking rendezvous for Sunday Night (the night we celebrated V-Day because celebrating during a weekday is near impossible for working folks haha)


Everything pictured above I made from scratch. The cheesecakes I made the night before and let set in the fridge overnight so that I wasn't so stressed the day of, but everything else I made in one night.  The approximate time it took me to finish everything from beginning to end was around 2.5 hours.  It was WELL worth it let me tell you.  He LOVED every bite :) In one of the photos above you can even see what I got him for V-day--his own custom beer labels :) I bought some of his favorite beer and attached the custom labels so he could have his own Valentine's Day beer to sip on while he enjoyed his Valentine's Day Dinner, it was really the icing on the cake!

If you guys want recipes for any of the things I mentioned above, please let me know in the comments below and I will either do another post with all the recipes or forward them to you individually.  I know I am posting this on Valentine's Day, but this meal could even come in for a great Birthday or Anniversary meal or heck an everyday meal to show you love someone (Family, Friends etc) ! <3


Happy Valentine's Day Everyone,

xox

Pin It

Monday, December 19, 2011

Holiday Series: SUPER Easy Treat to Bring to Holiday Dinner's/Parties!

Although many company parties have passed, my family and a lot of others get together for Christmas Eve.  Whether it be for a more formal party or just spending quality time with one another and sharing a warm meal, I know I always feel obligated to bring something, even if I'm not asked to.  Below is something you have probably all eaten at one point or another and I know I am not the only one who has posted about this, but this was my journey so come along if you wish :)

Peppermint Bark requires NO baking and you can even do it with children, which is another thing I absolutely love.  It pleases a lot of different people because its not too overpowering and has something most (minus myself!) love, chocolate.

Here's the super simple "recipe" I used---way too easy for me to even think of this as a recipe haha:

Things you will need:

*Parchment Paper
*Small Baking Pan (or large if you're going for a larger amount)
*2 16 oz. packages of chocolate morsels--NEVER bake with chocolate you wouldn't eat alone (good quality chocolate)--it just comes out bad. For this you can mix white and milk chocolate or do all of one etc. Totally up to you! This amount makes enough for a small baking pan. Adjust accordingly
*Peppermint Candy Canes or Candies
*optional*--Cute Treat Tin

Directions:


1. Line your baking tin with parchment paper, this makes it so easy to get the chocolate out after it's done.


2. Melt your chocolate in the microwave. I did one minute, stirred it and then did one final minute and it was perfect! You want to melt them separately.


3. In the meantime, grab a food storage bag/plastic bag and put about two handfuls of the peppermint candy inside. Place this bag on top of a cutting board and begin banging away. I used my rolling pin and it worked wonders. WARNING: The bag can tear a little if you go "Incredible Hulk" on it so beware and if you feel like you want to be extra safe, double bag them :)


4. After the chocolate for the first layer is smoothly melted, spread it around the bottom of the pan with a rubber spatula or wooden spoon.  Try to get as even a layer as possible and smooth it down really well. Place this in your refrigerator for about 20 mins or until nice and hardened. --While you are waiting for this, go ahead and melt your white chocolate morsels :)
5. Spread the white chocolate in the same exact manner, right on top of the hardened milk chocolate.  Do this quickly because the cold from the milk chocolate will make the white chocolate harden pretty quickly.  The reason we want to work quickly is because we want to sprinkle our peppermint crumbles on and have them stick and set in the mixture before it hardens! (As you can see some of the peppermint pieces are bigger than others and some just look like peppermint dust, this is because some people prefer a nice chunk of peppermint and some like just a hint--this way you please everyone!)


6. Grab your decorative holiday tin and line the bottom with tissue paper.  On top of the tissue paper (just on the bottom layer) line that with a rectangle of parchment paper.  (this makes sure you don't have tissue paper directly on your food product.)

7. When your Peppermint Bark has completely hardened in the refrigerator (about another 25 mins to be safe) remove them from the pan and cut into little rectangles or squares, whatever you want. Nicely place them in your tissue lined tin and place another piece of parchment paper over the top before folding the tissue paper over to close.


8. Tape two candy canes on top and slap a bow on and you're set to go! This makes a great gift, is SO inexpensive to make and literally can be done without ever turning on your oven, does it get any better than that? Not to mention that I am not even a chocolate lover, but this my dears is delicious! I will be making this for a holiday party I am attending this weekend, and I can't wait to see how everyone likes it!

To stress-free & yummy Holiday treats,

xox

Monday, November 14, 2011

My Attempt At Making Lumpia Was A Success!!


For those of you thinking "Lumpia"--what the heck is that?! Well, my friends, it is an absolutely DELICIOUS Filipino version of an egg roll, pretty much.  I don't like Chinese egg rolls actually, but I love these babies! My boyfriend's sister hosted a "Pacquiao-Marquez" fight night party at her house.  Being that Pacquiao was the man we were "rooting" for (mind you I know NOTHING about the technicalities involved in boxing really haha), I thought it would be fitting to make a traditional Filipino appetizer. This was my first time ever attempting this and I went off of pretty much photos and a bunch of variations of recipes on the net.  The ingredients I used were pretty much a little of each recipe I found, making sure I only used things that I actually didn't mind tasting myself.  Needless to say, after having my boyfriend roll them together (as frustrating as it was!) they came out absolutely perfect.  Crispy on the outside, juicy and flavor filled on the inside--I was in heaven! You don't have to use ground pork, you can actually use ground chicken or beef etc, but I tried to stay true to what I was reading from most of the recipes (as well as a few Filipino friends we have) and I used Pork.  (I RARELY eat pork, this was definitely an exception!) 

I am not going to give you the run down on the actual recipe I used because honestly, it would be too difficult to recall exactly what measurement of each I used! I can however, recommend a fabulous Lumpia recipe from a Filipino Guru on YouTube that you all probably know, ItsJudysLife! She makes these with her mom and they look VERY close to the recipe I actually used, AND we even use the same dipping sauce (which by the way was the icing on the cake I'm telling you! DIVINE)!

**To get the Lumpia Wrappers and the dipping sauce, I visited a local Filipino Market (thank goodness my boyfriend lives in a well cultured area!) They had everything there, although I only bought the sauce and wrappers there. I purchased everything else at a regular supermarket.  

Watch Judy's video and give these a try! My version came out SUPERB and I already got requests to make 100+ for a Christmas party :) 

To see Judy's Video Click Here

To food that packs a punch like Pacquiao, 

xox

Thursday, October 13, 2011

Good Eats: Pumpkin Spice Cupcakes with Cream Cheese Frosting!


I made these cupcakes because anything Pumpkin makes me feel cozy and warm inside during the Fall Season :) I had no idea how they were going to come out as this was my first time making them, but they were BEYOND a huge success...16 were consumed in less than 24 hours! haha (not by only me of course, imagine!) lets get started so you can enjoy too:


Ingredients:  (yields about 16 cupcakes)

1 tsp Pumpkin Pie Spice (found in those little plastic jars in the spice aisle of your supermarket)
1 cup of All Purpose Flour
1/3 cup of Vegetable Oil
2 Eggs
1 cup white granulated sugar (the regular kind we all have in our kitchen!
1/2 tsp of Vanilla Extract
1/4 tsp salt
3/4cup of Pure Pumpkin Puree (make sure its not pumpkin pie FILLING, there is a big difference!)
1 tsp of Baking Soda
1/2tsp of Baking Powder


Oven Temp : 350


1. In a large bowl, whisk together the eggs, pumpkin puree, vanilla, sugar and vegetable oil. Add the dry ingredients and keep whisking together until everything is well mixed. 


2. Grab your pre-lined cupcake tin and get your ice cream scooper out (these are also sold as cookie scoopers) and begin to scoop the cupcake batter into the cupcake liners, filling them about 2/3 of the way up. 

3.Bake for about 20 mins, or until you stick a toothpick of small knife (which is what I had to do here!) can easily be inserted into the center of each cupcake and come out clean! This means they are done and ready for cooling. 

4. Take the cupcakes out of the tray and allow them to cool before frosting. 


Cream Cheese Frosting...homemade!

Ingredients: 

2 Tbsp. Milk
4 oz of Cream Cheese, at room temperature
4 Cups of Confectioners Sugar
2 Tbsp of Unsalted Butter, at room temperature
½ tsp of Vanilla Extract

1. In a large bowl you are going to want to whisk everything together EXCEPT the milk. Make sure everything is thoroughly mixed together with no lumps and bumps. I find that adding the confectioners sugar a cup at a time really helps this all come together smoothly :)


2. Lastly, add the milk and mix together again, just until everything is combined. Cover this frosting mixture with plastic wrap and set aside, I set mine in the fridge just because its a habit of mine haha but you don't have to--outside the fridge will work just as well.You are going to want to leave it be for about 45 mins.  


3.You are now ready to frost your cupcakes! For this, I use the back of a teaspoon, I find that it makes spreading and smoothing out the frosting onto the cupcake SUPER easy.  Also note that in the picture above you can see that I haven't mounded on the frosting, unless you are a frosting fanatic, I think that a little frosting really adds just the "icing on the cupcake" haha You don't want the icing to overpower the delicious pumpkin spice flavors that you have in the actual cake part. Cloves, Nutmeg, Cinnamon etc, those flavors will come through beautifully if you trust me on this! :)

There you have it--I hope if you are reading this that your mouth is watering and you're thinking of when you're going to whip these babies up, just posting this made me want to make another batch! Enjoy! 

Pumpkins and Cream Cheese, 

xox

Wednesday, October 5, 2011

Good Eats: Banana Cream Pie!

Yummm, as I type this blog post, I am craving yet another slice of this bad boy! So rich and delicious, who wouldn't love this recipe?! Lets get started: 

Ingredients: 

1 Medium Orange (I used a large one and found that it was super orangey so if you like this use a large one! I didn't mind :) 
1 Pre-made Nilla Wafer Crust (can be found in the baking aisle of your super market, if not use a graham cracker one!)
3 Bananas
3/4 Cups Granulated Sugar
1 Box Mini Nilla Wafers
1/2 Tsp. Vanilla extract
1.1/4 Cup Whipped Cream (you may use light or fat free as well, tastes just as good!)
2 Tbsp. ROOM TEMPERATURE butter (I used organic, you can use regular if you wish--non salted!)
3/4 Cup Heavy Cream
1/4 Cup Light Corn Syrup (can be found in baking aisle as well)
1/2 Cup water
1/4 Tsp. Salt (to bring out all of the wonderful flavors in this pie :)
5 Egg Yolks (I used Organic Brown Eggs, feel free to use whatever you prefer)
1/2 Tsp. Vanilla Extract (yes a separate 1/2 tsp--this is for the pastry cream filling)
1.1/2 Cups Scalded Milk
1 Tsp. Unsalted Butter (yes a separate 1 Tsp. this will be used for the filling as well)
2.1/2 Tbsp of Cornstarch
1/2 Cup Granulated sugar and a pinch more to your personal liking :) (this is another additional measurement)

Cooking Tools You Will Need: 

Whisk
Rubber Spatula
Wooden Spoon
Medium pot
Medium Bowl
Zester
Liquid and Dry Measuring Utensils


  • First you want to mix together all of the egg yolks and the 3/4 Cups of sugar. Add in the cornstarch and keep whisking until everything is a pale yellow color.
  • In the meantime, bring the milk to an almost boil and when it has reached this point, add it to your bowl slowly while also continuously mixing the egg yolk and sugar mixture. 
  • Pour this mixture in your medium saucepan and put the flame on low heat. While this mixture is warming, be sure to continuously whisk it until you realize it is thickened well. 

  • Once your mixture is thickened, remove it from the heat and add the orange zest (this adds such a delightful taste!) and the 1 Tsp. of Butter.  Mix well and place everything in a bowl being sure to cover the top with plastic wrap. You want to place the plastic wrap right on top of the mixture instead of on top of the bowl, this assures that the pastry cream filling doesn't form a film at the top. Leave in the fridge until everything is cooled. 
  • Next we are going to work on our homemade caramel! :) Begin by placing the water and light corn syrup into another medium sauce pan. 
  • Add the second listing of sugar (1/2 cup) and be sure to NOT mix it all together, just let it sit there in a white mound on the bottom of the pan--I have OCD tendencies so this was SO hard to do haha
  • Put this over medium low heat until you can't see anymore of the white sugar and you are confident it has dissolved.  
  • After you see this, pipe up the heat to high and bring it to a vigorous boil, remember not to stir! This process will take about 10-13 mins, but be patient, you want to wait until it reaches a nice amber like color :)

  • Once the mixture in your medium saucepan has turned an amber color,  turn the flame back down to low and add in your room temperature heavy cream. BE SURE TO DO THIS VERY SLOWLY! 
  • Continue to whisk this heavy cream in pretty fast, you don't want to go too slow or the caramel will form a clump on your whisk, believe me, I've done that before! (your mixture is going to look pretty out of control once you begin adding the heavy cream, but take control of it and don't let it control you! lol whisk whisk whisk and you MAKE it come together! :)
  • After everything is combined and you have what looks like caramel, add 3/4 of this in with your sliced bananas in a bowl and coat them evenly. (I say 3/4 of the caramel because you may want to use some of the leftover caramel as a drizzle for decoration before serving)

  • Place this banana caramel mixture as the first layer in your pie, smoothing it our over the bottom. 
  • Place your mini Nilla Wafers as a thin second layer right over the banana mixture. 
  • Remove your heavy cream from the fridge (hopefully fully cooled at this point) and spread a layer of that over your Nilla Wafers being sure to smooth everything out evenly. 

  • Lastly, take out your whipped cream and spread this as the final layer. I am going to warn you now, some of the caramel may ooze out of the sides depending on how thick you have made your layers, but have no fear, this can easily be wiped up and your pie will not suffer in flavor because of this :) 
  • Don't worry yourself about being perfect while spreading your whipped cream, the "homemade" look is what we are going for anyway right?!
  • Leave this pie in your fridge for at least 4 hours (I left mine over night because after 4 hours it still wasn't "set" all the way and not everything had congealed together as I would have liked it to at that point. 
  • Place a piece of aluminum foil under your pie so that if any of that yummy filling leaks out, your fridge will be saved! 
There you have it! When you slice into this, you will have a little slice of heaven. You taste everything from the caramel to that sweet pasty filling and even the lovely orange--zest is pretty strong!

This recipe was a hit with everyone who had the pleasure of trying a piece, its truly a piece of comfort, and I LOVE bananas and anything banana so this is for sure one of my favorite pies to make :)

3 Bananas and some Caramel,

xox